
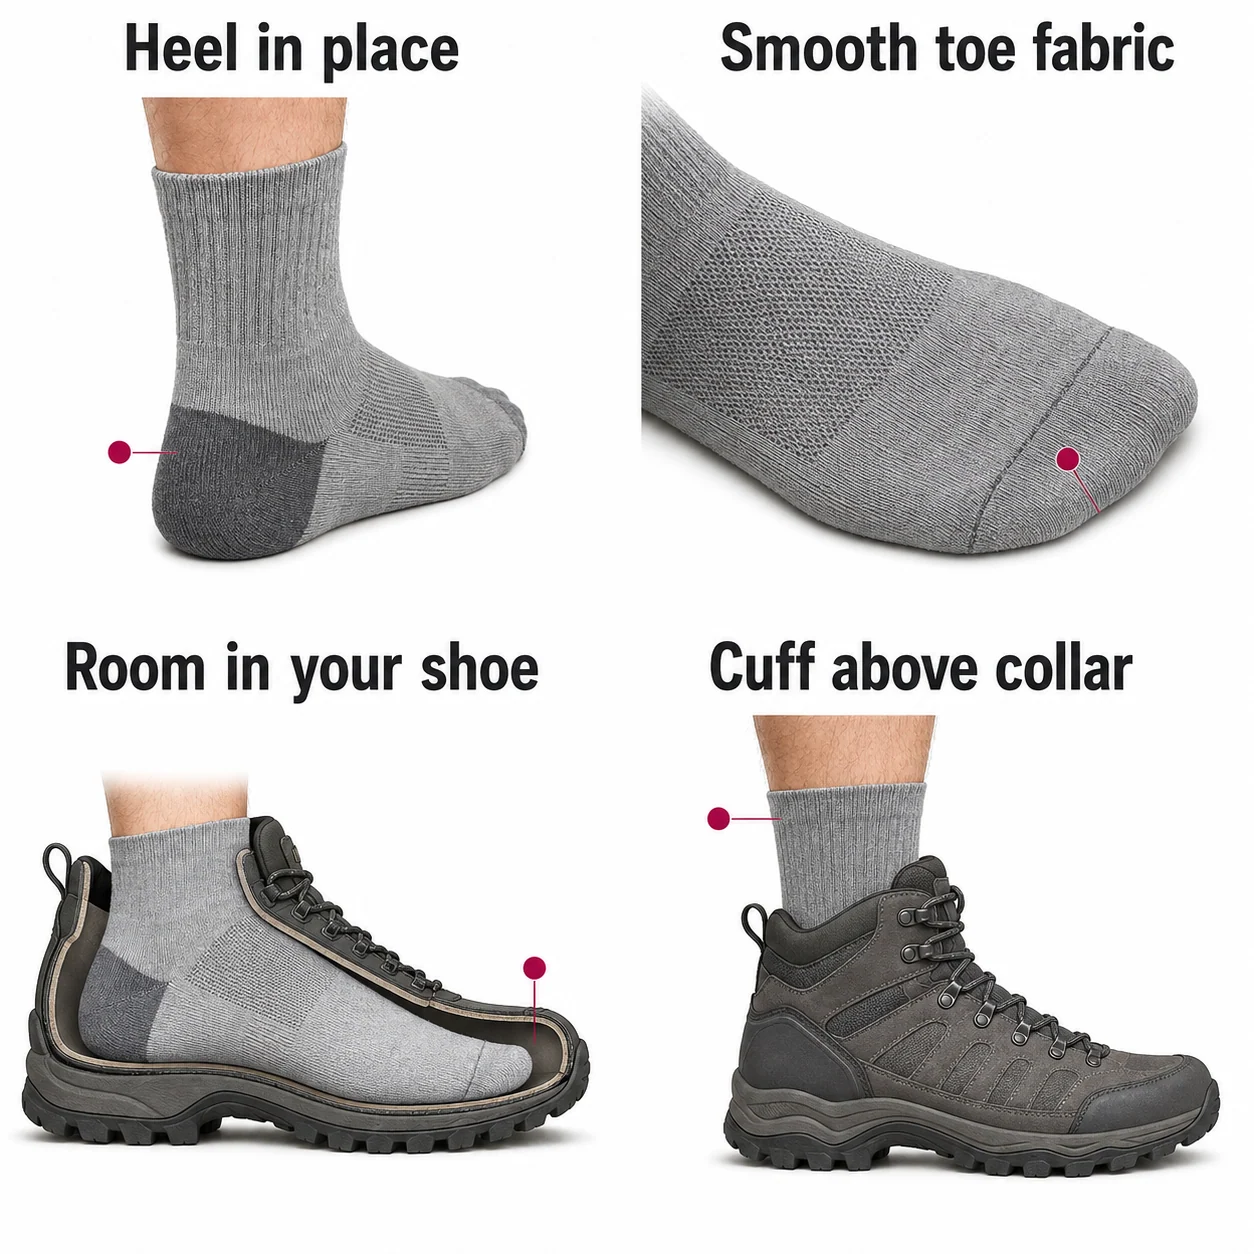
- HeelHeel pocket stays centered on your heel.
- ToesToe fabric lies smooth without pulling or folds.
- Footwear spaceThe complete sock and insole leave room in the shoe.
- CuffSock fabric extends above the rubbing collar.
Rubbing begins → stop, remove grit and folds, re-seat the sock, then recheck the footwear.
Before the trip: test the complete fit
Start with the exact model’s size chart, seat the heel pocket and smooth the sock under the foot. Try the intended shoes, insoles and socks together. Check toe room and cuff clearance while standing and walking; do not add padding to footwear that is already too tight.
Use a short walk before committing to a long route. A liner, toe sock or different cushion changes the space inside the shoe, so repeat the fit check with the complete combination. Check shop return conditions before wearing a new pair outside.
At the first rubbing or warm spot: stop and recheck
Stop at a safe place rather than waiting for the next planned break. Remove the shoe and sock, clear grit from both, and inspect for folds, a shifted heel or damp fabric. Re-seat the sock without pulling the toes tight and check the lacing and footwear pressure.
These steps address equipment fit and routine prevention. An existing blister, broken skin or persistent pain needs appropriate first-aid guidance; continuing to change sock thickness is not treatment. This guide does not cover wound care or diagnosis.
Use breaks to check grit, dampness and slipping
NOLS recommends clearing sand and grit during breaks and checking early hot spots. Make the sock and shoe inspection part of your normal stop: fabric can shift after the initial fit check, and a clean starting pair does not stay free of trail debris.
If you change into a dry pair, smooth it and repeat the shoe fit check. A dry sock in saturated footwear may get wet again. For cuff entry and membrane tradeoffs, see the wet-trail sock guide.
Choose a liner or toe construction for the fit it changes
A removable liner adds a second separately washable item. An integrated double-layer sock keeps both layers together. A toe sock puts fabric between individual toes. Each changes where fabric sits; none establishes that your footwear has enough space.
Compare liners, double layers and toe socks before changing systems. For example, the Injinji Wool liner is a separate layer, while a Wrightsock Adventure has built-in layers. Trying either with a tightly filled toe box is a different decision from replacing an ordinary pair in roomy shoes.
Pack a dry change you can actually reach
Decide which pair is for walking and whether a separate dry pair is reserved for camp. Keep that reserve protected from the wet walking pair and accessible enough to use as planned. If you use an outer sock and liner, count both inventories.
Use the trip rotation planner with your own washing opportunities and drying estimate. A five-day plan with a long drying delay can run short even when the total pair count sounds generous. The calendar shows when a walking pair is available; a protected reserve is not silently spent to hide a shortfall.